FCPX Like a boss! (A Private Investigator Boss!)
So every few months things change on you from your software or your devices like your camcorder etc. and now you’re having difficulties with adding your date & time stamp. Or you simply want to catch up with the times! I strongly recommend Final Cut Pro X if your semi tech savvy. This software took my video to the next level. There are a few caveats; the software is only good for Mac, the processing time is going to rely on your machine’s ability to crunch video etc.
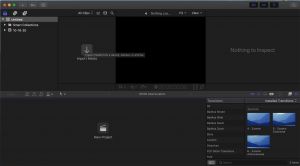
So with that being said, let’s get started. Download and open final cut pro. Then start a new library. Second, you should start and a new project. I usually use a claim number, file number or my subjects last name for ease of use. Now you’re ready to begin.
Click the image to watch our video:
Take you camera or SD card and drag the video to your external hard drive. Once transferred, remove your device/SD card. At this stage, I would recommend deleting all of your downloads, cache out of your library, and empty out your trash. This will free up space on your machine. This is vital when exporting. If you have a lot of video and you know your machine doesn’t have much hard drive space, I would work in batches. (and again, delete FCPX library backups, cache & trash for space. It is a few extra steps but the last thing you want is your video freezing up because you don’t have enough disk space.)
Now, select and drag your video into the lower time line. The video will drop and in numerical order. Let’s select all {Command + A} and then head to the top left and find “clip” and in that drop down, select “detach audio.” You will see your Audio will detach from the video into a new green field in the time line. Select all audio files and hit the delete button. No more audio flubs or worries! Lord only knows what you’ve said while you were twisted like a pretzel and trying to shoot video!
Now that the audio is out of the way, I suggest a quick glance over your video and if you have some unnecessary long clips without the subject or maybe some unnecessary time shots, I’d recommend cutting the few clips or cut longer ones down.
Finally we can work on the date & time!
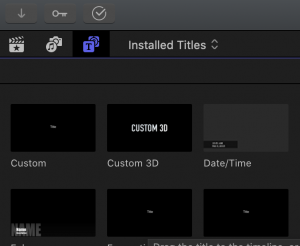
Go to your TITLES! (upper left of the FCP window) Select the “T” 
If you know your video is going to court I would stop here, review the video and if all is well, export it. (Upper right corner; small box with an arrow)
KISS method folks! Nothing fancy or applicants attorney will make it look like you’re a video production expert and that you’ve “edited the video.
Stay away from the word “edit.” You only imported the video, used the software for the date & time stamp. If you had to cut the video I would keep two versions; long & short. When in court you can say you’ve cut the video down to save the court “your honor’s time” and you have the full version for everyone if need be.
I hope this helps and Happy Hunting.
Admin
If you have any suggestions on how we can improve FYI or for our next article. Please email us at admin@findyourinvestigator.com.


